PS2 Linux Programming
Transforming a Coloured Quad With VU1
Introduction
This tutorial will demonstrate the use of VU1 for vertex transformation prior to rendering. A transformation matrix will be uploaded to VU1 data memory along with untransformed vertex data. Following transformation by VU1, the data will be transferred to the GS for rendering via Path 1.
Program Overview
After initialisation, the compiled VU1 microcode is uploaded into VU1 micro-memory. Both the static and dynamic packet memory areas are used in this example. The data that does not change from frame to frame is compiled and stored in static memory. This data is a scale vector used for vertex transformation, a GIFTag and the vertex data for a coloured quad. The transformation matrix used to transform the vertex data does change every frame and this is stored in dynamic memory and refreshed every frame.
Within the game loop, the transformation matrix is computed and stored in dynamic memory along with the necessary VIFCodes. Also stored in dynamic memory is the DMAC call tag to initiate the uploading of the static packet data.
The Main Program in Detail
The first matrix to be built is the projection matrix.
Projection Matrix
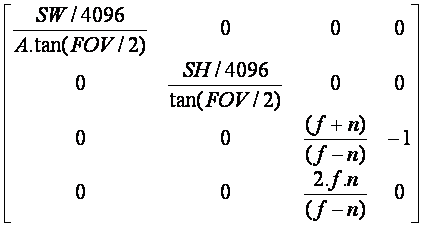
This is the standard projection matrix introduces in an earlier tutorial with a few modifications. Firstly, the x-axis has been scaled by a factor of SW/4096 and the y-axis by SH/4096 where SW and SH are respectively the width and height in pixels of the viewable screen area. The reasons for applying these scaling factors will be discussed later in this tutorial. Also notice that the negative sign has been dropped form the 2.f.n/(f – n) element. This is simply to account for the fact that the near and far planes are specified as positive numbers (rather than the correct negative numbers) for convenience.
The second matrix to be built is the camera or view matrix. This matrix is constructed form three vectors which specify the position, direction of view and orientation of the camera. From these vectors it can be seen that the camera is positioned at the origin, looking directly down the negative world z-axis, and the world y-axis is the camera’s up directional vector. The LookAt() method of the Matrix4x4 class builds the required view matrix.
The third matrix to be built is the combined view and projection matrix. Notice that the order of building this matrix is important. The view matrix must be applied first, followed by the projection matrix, i.e.
matViewProj = matView * matProj
Next the static DMA packet data is constructed. Before investigating this compilation it is instructive to outline the layout of data in VU1 data memory. Remember that data in VU1 memory is 128 bits wide and addresses are given in qword units.
|
Address |
Data |
|
0 |
Transformation Matrix Row #0 |
|
1 |
Transformation Matrix Row #1 |
|
2 |
Transformation Matrix Row #2 |
|
3 |
Transformation Matrix Row #3 |
|
4 |
Scaling Vector (number of vertices in w) |
|
5 |
GIFTag |
|
6 |
Colour for Vertex #1 |
|
7 |
Position for Vertex #1 |
|
8 |
Colour for Vertex #2 |
|
9 |
Position for Vertex #2 |
|
10 |
Colour for Vertex #3 |
|
11 |
Position for Vertex #3 |
|
12 |
Colour for Vertex #4 |
|
13 |
Position for Vertex 4 |
|
14 |
Colour for Vertex #5 |
|
15 |
Position for Vertex 5 |
|
16 |
Colour for Vertex #6 |
|
17 |
Position for Vertex 6 |
VU1 Data Memory Layout
The first thing added to static memory is the UNPACK VIF code.
VIFStaticDMA.AddUnpack(V4_32, 4, 2 + iVerts * 2);
V4_32 is the data format to be unpacked, which in this case is four 32bit floating point numbers. The 4 specifies that the data is to be unpacked starting at VU1 address 4 and the final parameter is the number of qwords to unpack, which in this case is the scale vector, the GIFTag and the 6 vertices which is a total of 18 qwords.
Following this data, two more VIF codes are added to static memory. FLUSH waits for the state in which transfers to the GIF from PATH1 and PATH2 have ended after the end of any micro program in VU1. This effectively stalls further processing until the GIF is ready to accept more data. MSCALL(0) waits for the end of any micro program that is currently running then activates the micro program starting at the address specified as the parameter. MSCALL(0) will therefore start execution of the micro program starting at address 0 in VU1 micro memory.
Next for discussion is the main game loop and the construction of the dynamic packet data. Firstly, a world matrix for the object to be rendered is constructed. Some rotation components are computed together with a translation matrix which positions the object at (0, 0, -15), i.e 15 units down the negative z axis. The vertex transformation matrix is then computed from:
matWVP = matWorld * matViewProj
Notice that the World matrix is applied first following by the combined view/projection matrix. matWVP is the matrix that will be used by VU1 to transform the vertex data.
Building the dynamic packet data is then accomplished as follows:
SPS2Manager.BeginScene();
VIFDynamicDMA.AddUnpack(V4_32, 0, 4);
VIFDynamicDMA.AddMatrix(matWVP);
VIFDynamicDMA.DMACall(iStaticAddr);
SPS2Manager.EndScene();
First there is an unpack VIF code which unpacks 4 qwords of data to VU1 data memory starting at location 0; this will be the transformation matrix. Next the transformation matrix is added to memory, this being 4 qwords in size. Finally, there is the DMA call to upload the static data which was described above.
The above describes the function of the main program code. Notice that the main purpose of this code is to compile data packets which can then be sent to VU1 for further processing.
VU1 Micro Program.
The VU1 micro program is relatively short and is repeated below for clarity.
ProjMat equ 0
Scale equ 4
GIFTag equ 5
StartVert equ 7
NumVerts equ 6
.init_vf_all
.init_vi_all
.syntax new
.vu
--enter
--endenter
iaddiu iVert, vi00, 0
iaddiu iVertPtr, vi00, 0
iaddiu iNumVerts, vi00, NumVerts
iaddiu iADC, vi00, 0
lq fScales, Scale(vi00)
lq fTransform[0], ProjMat+0(vi00)
lq fTransform[1], ProjMat+1(vi00)
lq fTransform[2], ProjMat+2(vi00)
lq fTransform[3], ProjMat+3(vi00)
loop:
lq Vert, StartVert(iVertPtr)
MatrixMultiplyVertex Vert, fTransform, Vert
Div q, vf00[w], Vert[w]
mul.xyz Vert, Vert, q
mula.xyz acc, fScales, vf00[w]
madd.xyz Vert, Vert, fScales
ftoi4.xyz Vert, Vert
sq.xyz Vert, StartVert(iVertPtr)
isw.w iADC, StartVert(iVertPtr)
iaddiu iVert, iVert, 1
iaddiu iVertPtr, iVertPtr, 2
ibne iVert, iNumVerts, loop
iaddiu iGIFTag, vi00, GIFTag
xgkick iGIFTag
--exit
--endexit
Firstly there is some initialisation and configuration to be done. The equ directive is just like #define in C and is used to initialises the specified constants. .init_vf_all and .init_vi_all tell the VCL compiler that it is free to use all of the floating point and integer registers as it sees fit, .syntax new indicated that VCL can use the new coding syntax (there are older versions of VCL) and .vu says that we are writing VU code. The final part of the initialisation is -–enter and –-endenter which specified the entry point of the micro program.
The first thing to be done within the actual program code is to initialise some variables and load the transformation matrix and scale vector into floating point registers. iVert is a vertex counter which is initialised to zero, iVertPtr is a pointer which is used to index into the vertex data and iNumVerts is the number of vertices to be processed. Notice that the number of vertices to be processed is hard-coded to 6 in this VU1 program. The lq instruction loads data from the specified data memory location into floating point registers.
The main processing is performed within the section of code that forms a loop. The first vertex is loaded and transformed by the transformation matrix:
lq Vert, StartVert(iVertPtr)
MatrixMultiplyVertex Vert, fTransform, Vert
MatrixMultiplyVertex is a macro that is contained within the file vcl_sml.i and as the name suggests it multiplies a vector by a matrix.
The vector (vert) obtain at this point must be converted back to homogeneous coordinated (i.e. make the w component unity) and this is achieved using:
div q, vf00[w], Vert[w]
mul.xyz Vert, Vert, q
These lines of code effectively divide the x,y and z components of the vector by it’s w component.
Scaling of the vertices into values that can be drawn in the frame buffer is performed with the following three lines which will need some further explanation:
mula.xyz acc, fScales, vf00[w]
madd.xyz Vert, Vert, fScales
ftoi4.xyz Vert, Vert
The first of these lines is simply a method of getting the scale vector into the accumulator. The instruction madd is a product/sum instruction which adds the product of Vert and fScale to the accumulator and stores the result in Vert. Remembering that fScale has just been loaded into the accumulator, the result of the madd instruction is as follows:
Vert.x = fScale.x + Vert.x * fScale.x
Vert.y = fScale.y + Vert.y * fScale.y
Vert.z = fScale.z + Vert.z * fScale.z
Now fScale.x = fScale.y = 2048. Also, remember that in the projection matrix the x coordinate was scaled by SW/4096 and the y coordinate by SH/4096. Putting these numbers into the above equation provides
Vert.x = 2048 + x * (SW/4096) * 2048
Vert.x = 2048 + x * (SW/2)
And similarly
Vert.y = 2048 + y * (SH/2)
Vert.x and Vert.y are now exactly what is required. Given that their value will be between -1 and +1, the vertex will be offset by 2048 and scaled by the width and height of the screen as appropriate.
Considering now the z coordinate, recall that the scaling factor for this coordinate is ((float)0xFFFFFF) / 32.0f or (2^24)/32. So the z coordinate scaling is as follows:
Vert.z = (2^24)/32 + z * (2^24)/32
These z buffer values do not seem quite right but now consider the action of the final of our three scaling instructions
ftoi4.xyz Vert, Vert
This instruction converts the vertex data to the required 12:4 floating point format that is required for the x and y vertex data in packed format. The z component is required as a “straight” integer so the ftoi4 instruction has the effect of multiplying the z coordinate by 16 before it is stored. Thus the final z coordinate value is:
Vert.z = (2^24)/2 + z * (2^24)/2
Now, remembering that the z buffer has a 24 bit resolution and that the transformed z coordinate will be between -1 and +1, this equation provides us with exactly what is required for z sorting within the z buffer.
Next the transformed and scaled vertex is stored back into VU memory with the following instructions:
sq.xyz Vert, StartVert(iVertPtr)
isw.w iADC, StartVert(iVertPtr)
The second instruction above stores 0 into the w field of the vector to ensure that the ADC bit is cleared to zero allowing the vertex to be drawn.
The next three lines shown below control the looping process, ensuring that all four vertices are processed and transformed.
iaddiu iVert, iVert, 1
iaddiu iVertPtr, iVertPtr, 2
ibne iVert, iNumVerts, loop
Finally, the address of the GIFTag is loaded into an integer register and the xgkick instruction is used to start the transfer of the vertex data to the GIF.
iaddiu iGIFTag, vi00, GIFTag
xgkick iGIFTag
The –-exit and –-endexit signals the end of the micro program.
Conclusions
This tutorial has demonstrated the use of VU1 for vertex transformation and scaling.
Dr Henry S Fortuna
University of Abertay Dundee